In this post I am going to add a Web Part Zone snippet in page layout.
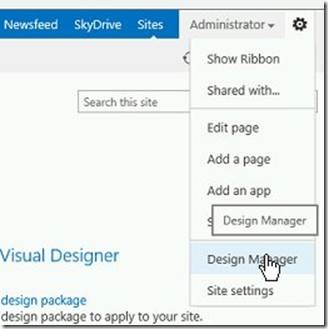
Step 1: Open the site then click design manager link from right top corner "Settings" menu.
Step 2: Click “Edit Page Layouts” link

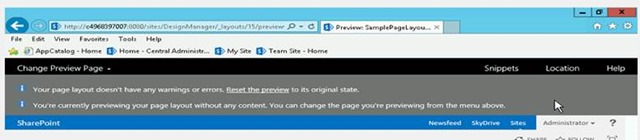
Step 3: Click “SamplePageLayout” .It will open preview page.
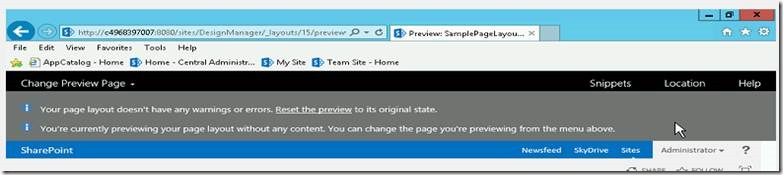
Step 4: Once open the preview page then click Snippets menu from top right side. It will open “Snippet Gallery” in new tab page.
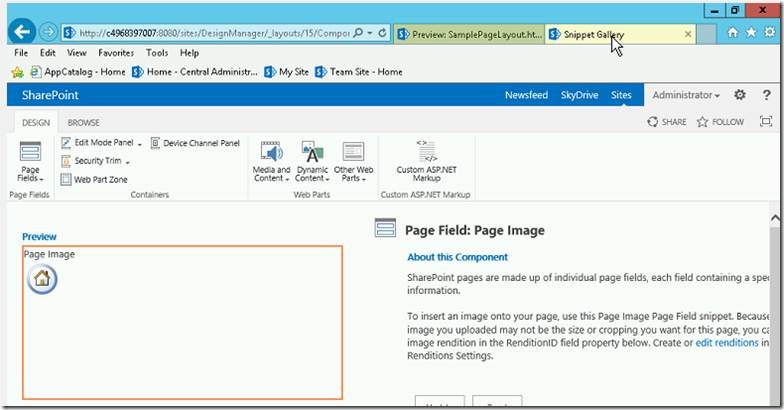
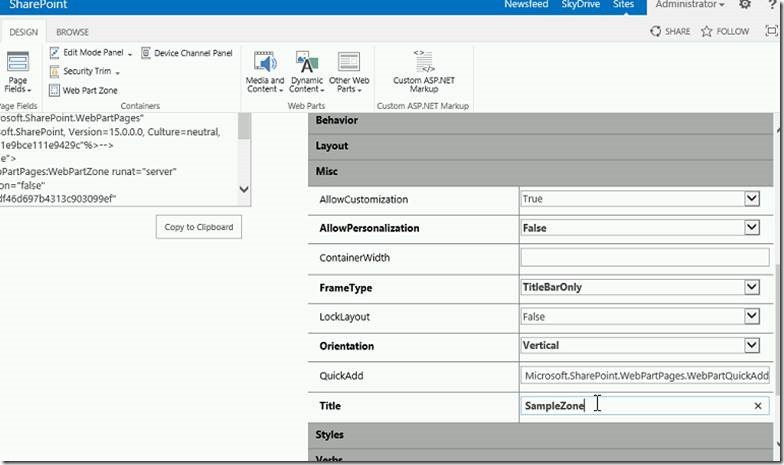
Step 5: Click the Web Part Zone menu item in “DESIGN “tab.
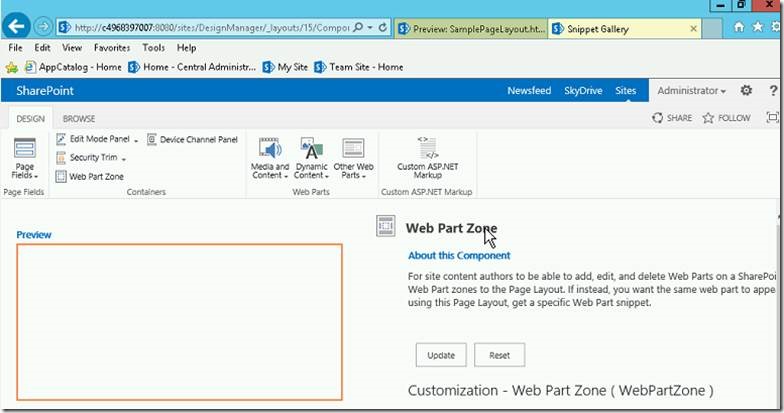
Step 6: In this page we can easy to configure component properties. Now, I will change the Web part Zone Title under Misc category. After customization must click the update button then only the changes are reflected in the component snippet.
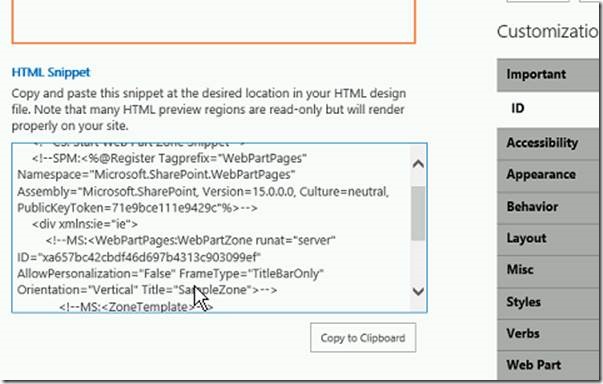
Step 7: Once click the update button the HTML code automatically generated in the “HTML snippet” box and click “Copy to Clipboard” button.
Step 8: Open the mapped network drive then open the page layout HTML fileand paste HTML snippet where you want the web part zone to show.

Step 9: We should add the HTML snippet inside of the <asp:ContentPlaceHolder ID="PlaceHolderMain" runat="server">. In my example I am remove all the default div tags (inside of the content place holder) and paste with my HTML Snippet content.
Default content

Replaced Content

Step 10: Once complete the activity the save the page and publish the page layout in design manager.

Step 11: Open the sample page (which we have used in “SamplePageLayout”) and click edit and try to “Add a Web Part”. You will see the web part zone title in the “Add part to” drop down.


Next Blog I will explain the create design manager master page package.
Happy Coding.
SanthoshBabu ManickaMohan


No comments:
Post a Comment